

Every week I'll be bringing out a Stampin' Up! stamp set from previous releases and we'll be making a card or other project with it.
In honor of the autumn season, this week's focus will be on the Fall Fest set from 2014 I believe.
For this card, you will need to cut; Mossy Meadow 11 X 4 1/4", Autumn themed DSP 5 1/4 X 4", Whisper White 4 7/8 X 3 5/8", Blackberry Bliss 1" wide and long enough to go across the card front, Whisper White 3/4" wide and long enough to go across the card front, Scrap of Whisper White to stamp and cut the Pumpkin image, Fun/Craft foam piece 5 x 3 3/4".
Not all of the items I use in this card are still available to purchase from Stampin' Up! The ones that are I have linked below.
And now, on to the card!
1. Score and fold the Mossy Meadow cardstock piece at 5 1/2" to create a standard A2 card base and set aside.
2. On the larger piece of Whisper White, stamp the leaves shown in Hello Honey, Lost Lagoon and Tangello Twist, diagonally from the top right corner of the paper, to the bottom left.
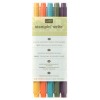
3. Ink the pumpkin stamp shown in Tangello Twist. Using a baby wipe or paper towel, carefully wipe the ink from the stem. Color the stem of the pumpkin in with a Mossy Meadow Stampin' Write Marker. Give the stamp a little "huff" and stamp onto the scrap of Whisper White. (TIP - you may want to use your Stampin' Pierce mat under the paper as this is a solid Photopolymer stamp and the mat helps to cushion it to get a better image.)
4. Using the Fun Fall Framelits, cut out the pumpkin image. Alternatively you can fussy-cut the pumpkin.
5. Using Snail adhesive, attach the Whisper White strip to the Blackberry Bliss strip of paper being sure to center from top to bottom. Stamp your sentiment on the Whisper White leaving room for the pumpkin image to the left side. I used a sentiment from the "And Many More" stamp set that is still available and linked below.
6. Center the now completed sentiment strip on the Whisper White panel and adhere with snail, being sure to leave enough room for the pumpkin. Turn the panel over and trim the edges of the strip flush to the edges of the panel.
7. Using Snail, center the stamped panel onto the piece of chosen DSP. I used last year's DSP called Color Me Autumn but any DSP would work to include the new Into the Woods DSP currently available in our Holiday catalog!
8. Using Fast Fuse adhesive attach the fun/craft foam piece to the back of the panel you just created being sure to center it so that it does not show from the front.
9. Again using Fast Fuse, attach the finished panel to the front of the card base being sure to center it nicely.
10. Lastly, using Stampin' Dimensionals, attach the pumpkin image to the front of the card as shown, to left of the sentiment stamp.
~And your card is now complete!
 |  |  |  |
 |  |  |  |
 |  |  |  |
 |  |  |
No comments:
Post a Comment