I'm back again with another fab Halloween project to make special treats for your special little ghosts and goblins!
Not long ago I was watching a video by Sam Donald, a UK Demonstrator. She designed and made this little box with a Thanksgiving theme and it was so cute I had to share it with you!
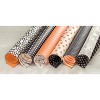
For this project you will need to cut; Basic Black 11 x 4", Happy Haunting DSP 3 1/2 X 8" plus scraps of both Basic Black and Very Vanilla.
1. Using your Simply Scored tool, score the Basic Black on the long side at 3 1/2", 5 1/4", 8 3/4" and 10 1/2". Place small notches just at the top at 4 3/8" and 9 5/8". Turn the notches to the left and score the short side of the cardstock at 2 3/4".
3. Cut away the tiny rectangle all the way to the bottom right.
4. Fold in and burnish all score lines to include gently folding the triangles, pushing the tips to the inside as shown. Cut up to the bottom score line on all folds remaining at the bottom.
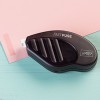
5. Apply a line of Fast Fuse to the front of the tiny rectangle tab all the way to the right. Bring the 2 ends together, be sure they're even and seal with the Fast Fuse.
6. Turn the box upside down, fold in the small side tabs and then the long tabs on top. Run a line of Fast Fuse to seal the bottom of the box. Turn it over, push in the side and pinch the top together... your base box is now complete!
7. Take your piece of Happy Haunting DSP and loosely wrap it around the box starting at the bottom, tenting over the top and back around to the bottom again. Gently pinch the fold lines at all 3 corners.
8. Take the DSP off the box and fold the score lines you made ensuring that the folds are straight as you go. Wrap it around the box again and using Fast Fuse, seal the bottom tabs together with enough give that the base box will slide in and out.
Your "Treat Tent" box is now complete and it's time to move on to the decorations! You can choose to decorate your box any way you choose. My decoration is below...
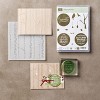
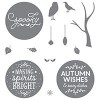
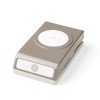
1. Using the scrap of Very Vanilla, the Spooky stamp from Among the Trees, Tangello Twist ink and your Stampin Pierce mat (because this is a solid photopolymer image), stamp the Spooky onto the cardstock and punch the image out with your 2" circle punch.
2. From the scrap of Basic Black, punch one Washi Label with the Washi Label punch. Cut the punched piece in half and mount the halves onto the back of the circle using snail. (TIP - use your grid paper to line up the pieces so they're straight behind the circle.)
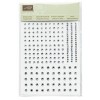
3. Using Stampin' Dimensials, mount the completed embellishment onto the front of your box. Attach small or medium gems to the eyes and your all done!
Happy Stamping!



No comments:
Post a Comment