Showing posts with label Designer Series Paper. Show all posts

Tuesday, January 31, 2017

Colorful Balloon Adventures Birthday Card and Video

Howdy Stampers! I'm getting a late start this week but have a wonderful card for you today!

This birthday beauty was made using the Balloon Adventures Bundle from the 2017 Occasions Catalog. I've also used the Balloon Bouquet punch to cut out the balloon embellishment on the front and 3 different patterns from the Party Animal DSP pack, also part of the Party Animal Suite.

All of the measurements for the paper pieces in this card are listed below and the video outlines how it's put together. 

This is a pretty quick card that looks like you spent forever on it with all of the layers and patterns going on ~ very fun and perfect for any birthday boy or girl!


Cardstock:
Tangerine Tango Card Base: 8 1/2 X 5 1/2" Scored @ 4 1/4"
DSP Layer 1: 5 1/4 X 4"
DSP Layer 2: 1 3/4 X 5 1/4"
DSP Layer 3: 1/2 X 5 1/4"
Centerpiece Tangerine Tango: 3 1/4 X 2 1/2"
Centerpiece Whisper White: 3 X 2 1/4"

Tuesday, January 3, 2017

Cupcakes & Carousels ~ The Suite

Card design inspired by BK Cards
When I first opened the new Occasions 2017 catalog, this suite caught my eye right away!

The color palette is so festive and happy with Bermuda Bay and Calypso Coral. The images have almost a vintage look to them and that's always a plus for me :)

Needless to say, I had to have all of it!

The DSP in this suite is super fun, I couldn't decide on a single design so chose 3 of them instead!

The stamps and dies to make the little cupcakes are from the Lift Me Up Bundle (Occasions Catalog) and the cute little bow was taken from the Cupcakes & Carousels Embellishment Kit... this is a good one!
Cupcakes & Carousels Embellishment Kit
The sentiment on the card is part of the Carousel Birthday stamp set and I stamped the other half of it on the inside...


Fun colors, lots of design possibilities ~ This Suite will be available for purchase on January 4th & gets Mama Bear's Thumbs Up!


Monday, November 9, 2015

Making Spirits Bright Card & Video Tutorial

Good Monday Morning All!

I took the weekend off to work on our house renovation project but I'm back this fine Monday Morning to share another card with you!

I've created this Christmas Card using Stampin' Up's Among the Branches stamp set along with some paper from the Season of Cheer Designer Series Paper Pack!

Lots of bright, fun colors and twinkling gems make this one a crowd pleaser for sure!

To make today's project you will need to cut the following pieces of cardstock and paper;

*Soft Sky - 8 1/2 X 5 1/2"
*Old Olive - 4 X 2 1/4"
*Designer Series Paper - Cut 2 at 4 X 2"
*Scrap of Whisper White for stamping and punching

You'll also need a length of Whisper White Seam Binding Ribbon as well as some Cherry Cobbler Ribbon. I used 1" Sheer Linen however it's now been discontinued...


HAPPY STAMPING!


A New Giveaway Has Begun!


Thursday, October 29, 2015

Gate Fold Christmas Card featuring Cup of Cheer by Stampin' Up! ~Video Tutorial

It's been a long three days this week but we've made it to Thursday and I have a new card for you complete with a video tutorial... where it's very clear I had a long day :)

To make this project you will need to cut the following;

*Real Red: 5 1/2 X 8 1/2", score at 2 1/8" and 6 3/8", fold each end into the center
*Old Olive: 2 pieces cut 1 3/4 X 2 1/8"
*Whisper White: 5 X 3 3/4" plus a scrap large enough to stamp and punch the image
Mossy Meadow: Large scrap to cut larger circle
Merry Moments Designer Series Paper: 4 pieces cut to 1 7/8 X 5 1/4", 1 piece cut to 4 X 5 1/4"

You'll also need about 10 inches of Real Red ribbon as well as the Old Olive and Real Red Stampin' Write Markers.

Now let's build our card!


HAPPY STAMPING!


Not Long Now!

Monday, October 19, 2015

Among The Trees Spooky Card & The Stampin' Up! 15% Off Stamp Sale!

Good Monday Morning my Stampin' Friends! It's a good morning for a couple of reasons today...

First, I have a new card for you... and Second....

STAMPIN' UP! STAMP SETS ARE ALL 15% OFF THIS WEEK!

October 19th through the 23rd, all stamp sets are 15% off!

Click the Shop Now button above or to the right and claim those sets you've had your eye on!

For today's project, you'll need to cut the following pieces of cardstock;
  • Basic Black: 8 1/2 X 5 1/2"
  • Tangelo Twist: 5 1/4 X 4", 3 1/2" Circle, 2 1/2" Circle
  • Very Vanilla: 5 1/8 X 3 7/8", Scrap for stamping and cutting 2" Circle
  • Happy Haunting DSP: 3" Cirlce
  • Black Glimmer Paper: 7/8 X 5 1/4"

1. Cut a card base of Basic Black at 8 1/2 X 5 1/2" and fold in half to create a top-folding, landscape card base.

2. Cut a layer of Tangelo Twist to 5 1/4 X 4". 

3. Cut a layer of Very Vanilla to 5 1/8 X 3 7/8", texture this piece with the Decorative Dots TIEF and attach to the Tangelo Twist layer centered and leaving a small border around all edges.

4. Cut a strip of Black Glimmer Paper to 7/8 X 5 1/4", layer over the Very Vanilla/ Tangelo Twist panel at the center.

5. Cut one 3 1/2" circle and one 2 1/2" circle of Tangelo Twist.

6. Cut one 3" circle from the Ghosts sheet of the Happy Haunting DSP pack.

7. On a scrap of Very Vanilla stamp the Spooky Circle in Archival Black Ink and punch out with a 2" Circle punch. 

8. Attach the Tangelo Twist/Very Vanilla panel to the card base being generous with adhesive. 

9. Place the 2 Tangelo Twist circles on the front of the card. The small circle should overlap the larger circle as shown in the picture above and adhere to the base.

10. Adhere the DSP circle over the larger Tangelo Twist circle allowing it to cover the overlapped portion of the small circle as well.

11. Using Dimensionals, adhere the stamped "Spooky" piece over the small Tangelo Twist circle and overlapping the DSP.

12. Finally, add two of the smallest Basic Rhinestones to the eyes.


HAPPY STAMPING!

Thursday, October 15, 2015

Throwback Thursday Hello Fall Corner Flip Card Tutorial & Video

Oh my goodness! Can you believe it's already Thursday? The weekend is just around the corner and I cannot wait!

Today's card is a fun one! Anyone that has followed me for a while knows that I'm a bit of a nut for unique card folds and interactive designs so when I saw the corner flip card, I had to give it a try!

To make this project you will need to cut;
*Soft Suede: 8 1/2 X 5 1/2" & 2 3/4 X 2 3/4"
*Whisper White: 5 X 3 3/4" & 2 1/2 X 2 1/2" & A scrap for the Sentiment banner
*Designer Series Paper: 5 1/4 X 4" & 2 5/8 X 2 5/8" ~ I used DSP from a pack called Color Me Autumn that is no longer available however Into the Woods would be perfect for this project as well!

Please remember that as this is Throwback Thursday, some of the products used are no longer available.


HAPPY STAMPING!

Built for Free Using: My Stampin Blog


Tuesday, October 13, 2015

Mama Bear Gives Thanks Card & Video Tutorial

Hello my Stampin' Friends, welcome to Tuesday and a whole week of video tutorials!

I took the long weekend off to spend with family but oddly had time to shoot lots of videos and even do some cleaning in my craft room... go figure!

Today's card is a case of one by another Stampin' Up! Demonstrator and I just love this design!

To make this project you will need to cut;
*Soft Suede: 11 X 4 1/4"
*Mossy Meadow: 2 1/2 X 4 1/4"
*Whisper White: 2 1/4 X 4 1/4"
*Another of scrap of Whisper White large enough to punch a 2 1/2" circle

You'll also need some Linen Thread and the little acorn from the Into the Woods Element pack ~ you can find the supplies linked below :)


HAPPY STAMPING!

Built for Free Using: My Stampin Blog

Wednesday, September 23, 2015

Tent Box Project Featuring Among the Trees Stamp Set

Good Wednesday to you friends!

I'm back again with another fab Halloween project to make special treats for your special little ghosts and goblins!

Not long ago I was watching a video by Sam Donald, a UK Demonstrator. She designed and made this little box with a Thanksgiving theme and it was so cute I had to share it with you!

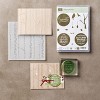
For this project you will need to cut; Basic Black 11 x 4", Happy Haunting DSP 3 1/2 X 8" plus scraps of both Basic Black and Very Vanilla.

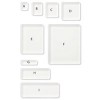
1. Using your Simply Scored tool, score the Basic Black on the long side at 3 1/2", 5 1/4", 8 3/4" and 10 1/2". Place small notches just at the top at 4 3/8" and 9 5/8". Turn the notches to the left and score the short side of the cardstock at 2 3/4".

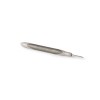
2. Using a ruler and your Simply Scored Stylus, score lines from the notches you made to either corner of the small rectangles as shown below.

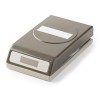
3. Cut away the tiny rectangle all the way to the bottom right.

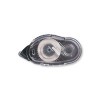
4. Fold in and burnish all score lines to include gently folding the triangles, pushing the tips to the inside as shown. Cut up to the bottom score line on all folds remaining at the bottom.

5. Apply a line of Fast Fuse to the front of the tiny rectangle tab all the way to the right. Bring the 2 ends together, be sure they're even and seal with the Fast Fuse.

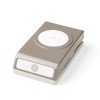
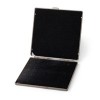
6. Turn the box upside down, fold in the small side tabs and then the long tabs on top. Run a line of Fast Fuse to seal the bottom of the box. Turn it over, push in the side and pinch the top together... your base box is now complete!


7. Take your piece of Happy Haunting DSP and loosely wrap it around the box starting at the bottom, tenting over the top and back around to the bottom again. Gently pinch the fold lines at all 3 corners.

8. Take the DSP off the box and fold the score lines you made ensuring that the folds are straight as you go. Wrap it around the box again and using Fast Fuse, seal the bottom tabs together with enough give that the base box will slide in and out.


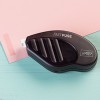
Your "Treat Tent" box is now complete and it's time to move on to the decorations! You can choose to decorate your box any way you choose. My decoration is below...

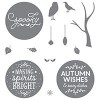
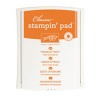
1. Using the scrap of Very Vanilla, the Spooky stamp from Among the Trees, Tangello Twist ink and your Stampin Pierce mat (because this is a solid photopolymer image), stamp the Spooky onto the cardstock and punch the image out with your 2" circle punch.


2. From the scrap of Basic Black, punch one Washi Label with the Washi Label punch. Cut the punched piece in half and mount the halves onto the back of the circle using snail. (TIP - use your grid paper to line up the pieces so they're straight behind the circle.)


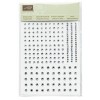
3. Using Stampin' Dimensials, mount the completed embellishment onto the front of your box. Attach small or medium gems to the eyes and your all done!


Happy Stamping!