Lots of people ask my why they should use the monthly hostess code when placing their Stampin' Up! orders for less than $150 before tax and shipping... the answer is simple.
I send each of my customers that place an order a handmade thank you note and a little gift that's been purchased using the hostess rewards accumulated from purchases made with that month's hostess code.
It could be an embellishment, designer series paper, a supply item... the list of goodies is only limited by what is currently available!
Please don't use the hostess code if your order is for more than $150 as you'll then have your own Stampin' Rewards to choose your own goodies with!
If you have any questions, please use the contact me button above and I'll be glad to help you!
Showing posts with label Craft Supplies. Show all posts
Thursday, January 5, 2017
Wednesday, January 4, 2017
Love Bug Valentine & Video
It's never too early to get a jump on making your cards for the holidays to come... no, not Christmas but Valentine's Day is right around the corner!
With the Occasions Catalog live and available as of today, you can scoop up the Beetles & Bugs stamp set to make these fabulous little note cards for your friends or even your children's classmates! They're bugs so you know the boys will love them and just cute enough for the girls too!
Today's The Day!
It's January 4th and Occasions 2017 is now live!
A whole new catalog with amazing new stamp sets, Bundles to save you 10% and beautiful embellishments to pull it all together!
On top of all of that, it's Sale-A-Bration time too!
Click the links at the bottom of the page to view the catalogs today!
Click HERE to shop now!
A whole new catalog with amazing new stamp sets, Bundles to save you 10% and beautiful embellishments to pull it all together!
On top of all of that, it's Sale-A-Bration time too!
For every $50 you spend on any available products, you'll be able to choose an item from the Sale-A-Bration catalog for FREE! Some of my favorites are the Carried Away DSP and the Hey,Chick stamp set!
Click the links at the bottom of the page to view the catalogs today!
Click HERE to shop now!
Monday, January 2, 2017
Beautiful You Sneak Peak & Video
It's just a couple of days away now... the launch of the Occasions 2017 catalog!
Today I'm sharing a sneak peak of one of my favorite stamp sets from the catalog, Beautiful You.
Beautiful images and tons of great sentiments, this set should top your "must haves" list this season!
Cardstock:
Stampin' Up! Note Cards & Envelopes in Whisper White
Basic Black: 4 3/4 X 3 1/4"
Stampin' Up! Watercolor Paper: 4 5/8 X 3 1/8"
Beautiful You Stamp Set - Available January 4th
Stampin' Up! Watercolor Pencils - Available January 4th
Jet Black Staz-On Ink
Stampin' Up! Aqua Painter
Today I'm sharing a sneak peak of one of my favorite stamp sets from the catalog, Beautiful You.
Beautiful images and tons of great sentiments, this set should top your "must haves" list this season!
Cardstock:
Stampin' Up! Note Cards & Envelopes in Whisper White
Basic Black: 4 3/4 X 3 1/4"
Stampin' Up! Watercolor Paper: 4 5/8 X 3 1/8"
Beautiful You Stamp Set - Available January 4th
Stampin' Up! Watercolor Pencils - Available January 4th
Jet Black Staz-On Ink
Stampin' Up! Aqua Painter
Labels:
Beautiful You,
Card Making,
Clean and Simple,
Craft Supplies,
Crafting,
Handmade Cards,
Occasions Catalog,
Paper Crafting,
Sale-A-Bration,
Stampin' Up!,
Watercolor
Location:
Cheyenne, WY, USA
Tuesday, November 17, 2015
Mistletoe & Holly ~ Stampin' Up's November Paper Pumpkin!
Oh My Gosh! I'm completely in LOVE with the
November Paper Pumpkin kit by Stampin' Up!
The cards are bright and colorful, the punch outs are intricate
and the embellishments just rock!
If you're not a Subscriber, you're missing out!
Check out this link ---> Subscribe to Paper Pumpkin!
and consider subscribing for December!
You can subscribe Month to Month with the link above or pre-purchase a subscription with these links... these make awesome gifts for the paper crafter at Christmas!
Thursday, November 12, 2015
Thinking of You at Christmas Card & Video Tutorial
Good Morning All! I'm back after taking the Veteran's Day Holiday with my family... actually, we installed a new furnace in the house we're remodeling but it was a good day!
Today's card is a fairly simple design but has a very classic Christmas feel. The colors of Crumb Cake and Cherry Cobbler sort of give it a gingerbread feel :)
Of all the Holiday DSP offerings this season I really like Merry Moments the best. The majority of the designs are simple however the colors make them all quite rich in my opinion.
To make today's project you will need to cut the following pieces of card stock:
*Crumb Cake: 8 1/2 X 5 1/2 scored at 4 1/4", 2 1/8 X 5 1/8" and a scrap for punching
*Cherry Cobbler: 4 X 5 1/4"
*Whisper White: Scrap for stamping and punching
*DSP: 2 X 5"
You'll also need a few inches of Crumb Cake Stitched Satin ribbon for the bow or another ribbon of your choice.
Let's get started!
Today's card is a fairly simple design but has a very classic Christmas feel. The colors of Crumb Cake and Cherry Cobbler sort of give it a gingerbread feel :)
Of all the Holiday DSP offerings this season I really like Merry Moments the best. The majority of the designs are simple however the colors make them all quite rich in my opinion.
To make today's project you will need to cut the following pieces of card stock:
*Crumb Cake: 8 1/2 X 5 1/2 scored at 4 1/4", 2 1/8 X 5 1/8" and a scrap for punching
*Cherry Cobbler: 4 X 5 1/4"
*Whisper White: Scrap for stamping and punching
*DSP: 2 X 5"
You'll also need a few inches of Crumb Cake Stitched Satin ribbon for the bow or another ribbon of your choice.
Let's get started!
HAPPY STAMPING!
![]() |
| Enter Today! |
Labels:
Card Making,
Christmas Card,
Craft Supplies,
Crafting,
Giveaway,
Handmade Cards,
Paper Crafting,
Stampin' Up!,
Stampin' Up! Holiday Catalog,
Tutorial,
Video
Location:
Cheyenne, WY, USA
Tuesday, November 10, 2015
Wishing You Peace Card & Video Tutorial
My goodness the days go by quickly don't they?! I was looking at Facebook just this morning and there's only 6 more Tuesdays until Christmas!
Today's card is a simple design, a great masculine look and we all know how hard those are to come up with!
I used an open plaid Designer Series Paper from the Merry Moments collection to keep things clean and the color palette fairly limited... you can of course change those up and decorate the background for more depth!
To make today's project you will need to cut the following pieces of cardstock;
*Smoky Slate - 11 X 4 1/4", scored at 5 1/2" to create a top-folding card base
*Real Red - 1 1/4 X 5", 1 1/4 X 4 1/2", 1 1/4 X 4", Scrap to punch 1 3/4" Scalloped Circle from
*DSP - 1 X 4 3/4", 1 X 4 1/4", 1 X 3 3/4"
*Whisper White Scrap to stamp and punch 1 1/2" circle from
I used sentiments from the Peaceful Wreath stamp set and a few sequins from my stash!
Today's card is a simple design, a great masculine look and we all know how hard those are to come up with!
I used an open plaid Designer Series Paper from the Merry Moments collection to keep things clean and the color palette fairly limited... you can of course change those up and decorate the background for more depth!
To make today's project you will need to cut the following pieces of cardstock;
*Smoky Slate - 11 X 4 1/4", scored at 5 1/2" to create a top-folding card base
*Real Red - 1 1/4 X 5", 1 1/4 X 4 1/2", 1 1/4 X 4", Scrap to punch 1 3/4" Scalloped Circle from
*DSP - 1 X 4 3/4", 1 X 4 1/4", 1 X 3 3/4"
*Whisper White Scrap to stamp and punch 1 1/2" circle from
I used sentiments from the Peaceful Wreath stamp set and a few sequins from my stash!
HAPPY STAMPING!
![]() |
| Enter Here! |
Labels:
Card Making,
Christmas Card,
Craft Supplies,
Crafting,
Giveaway,
Handmade Cards,
Paper Crafting,
Stampin' Up!,
Stampin' Up! Holiday Catalog,
Stamping,
Tutorial,
Video
Location:
Cheyenne, WY, USA
Monday, November 9, 2015
Making Spirits Bright Card & Video Tutorial
I took the weekend off to work on our house renovation project but I'm back this fine Monday Morning to share another card with you!
I've created this Christmas Card using Stampin' Up's Among the Branches stamp set along with some paper from the Season of Cheer Designer Series Paper Pack!
Lots of bright, fun colors and twinkling gems make this one a crowd pleaser for sure!
To make today's project you will need to cut the following pieces of cardstock and paper;
*Soft Sky - 8 1/2 X 5 1/2"
*Old Olive - 4 X 2 1/4"
*Designer Series Paper - Cut 2 at 4 X 2"
*Scrap of Whisper White for stamping and punching
You'll also need a length of Whisper White Seam Binding Ribbon as well as some Cherry Cobbler Ribbon. I used 1" Sheer Linen however it's now been discontinued...
HAPPY STAMPING!
![]() |
| A New Giveaway Has Begun! |
Labels:
Among the Branches,
Bundle,
Card Making,
Christmas Card,
Contest,
Craft Supplies,
Crafting,
Designer Series Paper,
Giveaway,
Handmade Cards,
Stampin' Up!,
Stampin' Up! Holiday Catalog
Location:
Cheyenne, WY, USA
Thursday, November 5, 2015
Magic of the Season Card Tutorial & Video
Good Thursday Morning to you! It's snowing in Wyoming! I LOVE the first snow of the season despite the mess it tends to make of things!
I'm back today with another Christmas card tutorial ~ and this one has Gold embossing!
The stamps used on this card from two separate sets byt Stampin' Up!; Cozy Christmas and Jolly Christmas... links below :)
I've again used multiple markers to "color" my sentiment stamp. It does take a little more time than a single ink pad but the difference it makes is BIG!
To make this project you will need to cut:
*Hello Honey: 8 1/2 X 5 1/2", scored at 4 1/4"
*Soft Sky: 3 1/8 X 5 1/4" & 2 5/8" Square
*Whisper White: 2 1/2" Square
*Season of Cheer DSP: 2 7/8 X 5 '
*Scraps of Whisper White and Soft Sky
You'll also need about 10" of 1/8" Gold Metallic Ribbon for the bow in the center.
I'm back today with another Christmas card tutorial ~ and this one has Gold embossing!
The stamps used on this card from two separate sets byt Stampin' Up!; Cozy Christmas and Jolly Christmas... links below :)
I've again used multiple markers to "color" my sentiment stamp. It does take a little more time than a single ink pad but the difference it makes is BIG!
To make this project you will need to cut:
*Hello Honey: 8 1/2 X 5 1/2", scored at 4 1/4"
*Soft Sky: 3 1/8 X 5 1/4" & 2 5/8" Square
*Whisper White: 2 1/2" Square
*Season of Cheer DSP: 2 7/8 X 5 '
*Scraps of Whisper White and Soft Sky
You'll also need about 10" of 1/8" Gold Metallic Ribbon for the bow in the center.
HAPPY STAMPING!
Tuesday, November 3, 2015
Loving Wishes Gorgeous Grunge Christmas Card & Video Tutorial
![]() |
| Design inspired by Tami White |
It's a new day and there's lots going on around here!
I have an exciting announcement coming tomorrow on Youtube so if you're not a subscriber, hit that button when you watch today's video and you'll know right where to find it tomorrow! Be sure to see the Giveaway link at the bottom of this post too!
Today's card is an awesome though somewhat different take on a Christmas card! But, we all have at least one person on our list that leans in a non-traditional direction... this one's for them!
To make today's project you will need to cut:
*Real Red: 11 X 4 1/4", scored at 5 1/2" to create your card base
*Very Vanilla: 5 3/8 X 4 1/8"
*Large scraps of Real Red, Pear Pizzazz and Very Vanilla to cut the 3 largest banners in the Banners Framelits Die set.
You'll also need about 10" of Pear Pizzazz ribbon. I used the 1/4" Cotton Ribbon for this card.
And now on to the show!
HAPPY STAMPING!
![]() |
| Click Here to Enter Today! |
Labels:
Card Making,
Christmas Card,
Craft Supplies,
Crafting,
Giveaway,
Handmade Cards,
Paper Crafting,
Stampin' Up!,
Stampin' Up! Annual Catalog,
Stampin' Up! Holiday Catalog,
Tutorial,
Video
Location:
Cheyenne, WY, USA
Monday, November 2, 2015
Merry Christmas Tree Card & Video Tutorial
![]() |
| Click Here to Enter! |
Good Monday Morning Friends!
Today is a very exciting day! The Season of Giving Giveaways have begun and the first one is live now! Just click the graphic above to be taken to the entry form!
In other news... I have a new card for you today! Bright and fun, it uses all sorts of Designer Series Papers and the Festival of Trees stamp set!
To make this project you will need to cut:
*Whisper White Thick - 11 X 4 1/4", scored at 5 1/2"
*Whisper White - 3 1/2 X 3 3/4", 1 3/4 X 3 3/4"
*Crumb Cake - 4 X 5 1/4"
*Mossy Meadow - 3/4 X 2"
*Designer Series Papers - 5/8 X 4 7/8" - 5 pieces
*Gold Foil Sheet - Scrap
You'll also need about 10" of ribbon, I used Crumb Cake Stitched Satin Ribbon.
HAPPY STAMPING!
Labels:
Card Making,
Christmas Card,
Craft Supplies,
Crafting,
Festival of Trees,
Giveaway,
Heat Embossing,
Paper Crafting,
Stampin' Up!,
Stampin' Up! Annual Catalog,
Stamping
Location:
Cheyenne, WY, USA
Friday, October 30, 2015
Stampin' Up! Shopping Haul & Introduction Sneak Peak at the Season of Giving Giveaways Coming Soon!
Good Morning My Friends! We've made it to Friday!
Today I've got a little Stampin' Up! haul for you as I received my most recent order yesterday afternoon...
It was a pretty big box but only a bit of it was for me... the exciting news is that this box contained all of the Season of Giving goodies that I'll be giving away over the next 8 weeks, beginning on November 2nd!
I'll give you a sneak peak of the first one as it's already posted and waiting to begin on the Mama Bear Ink Facebook page. The rest will be a surprise and revealed as the individual giveaways go live!
You can enter here on the blog or on Facebook by clicking HERE! The giveaways are limited to folks who live in the US and there is no purchase necessary to enter... just fill out the Rafflecopter entry form and you're in!
Today I've got a little Stampin' Up! haul for you as I received my most recent order yesterday afternoon...
It was a pretty big box but only a bit of it was for me... the exciting news is that this box contained all of the Season of Giving goodies that I'll be giving away over the next 8 weeks, beginning on November 2nd!
I'll give you a sneak peak of the first one as it's already posted and waiting to begin on the Mama Bear Ink Facebook page. The rest will be a surprise and revealed as the individual giveaways go live!
You can enter here on the blog or on Facebook by clicking HERE! The giveaways are limited to folks who live in the US and there is no purchase necessary to enter... just fill out the Rafflecopter entry form and you're in!
For now though HAPPY STAMPING & I Hope to see you there!
Labels:
Contest,
Craft Supplies,
Giveaway,
Paper Crafting,
Shopping Haul,
Stampin' Up!,
Stampin' Up! Annual Catalog,
Stampin' Up! Holiday Catalog,
Stamping,
Video
Location:
Cheyenne, WY, USA
Thursday, October 29, 2015
Gate Fold Christmas Card featuring Cup of Cheer by Stampin' Up! ~Video Tutorial
It's been a long three days this week but we've made it to Thursday and I have a new card for you complete with a video tutorial... where it's very clear I had a long day :)
To make this project you will need to cut the following;
*Real Red: 5 1/2 X 8 1/2", score at 2 1/8" and 6 3/8", fold each end into the center
*Old Olive: 2 pieces cut 1 3/4 X 2 1/8"
*Whisper White: 5 X 3 3/4" plus a scrap large enough to stamp and punch the image
Mossy Meadow: Large scrap to cut larger circle
Merry Moments Designer Series Paper: 4 pieces cut to 1 7/8 X 5 1/4", 1 piece cut to 4 X 5 1/4"
You'll also need about 10 inches of Real Red ribbon as well as the Old Olive and Real Red Stampin' Write Markers.
Now let's build our card!
To make this project you will need to cut the following;
*Real Red: 5 1/2 X 8 1/2", score at 2 1/8" and 6 3/8", fold each end into the center
*Old Olive: 2 pieces cut 1 3/4 X 2 1/8"
*Whisper White: 5 X 3 3/4" plus a scrap large enough to stamp and punch the image
Mossy Meadow: Large scrap to cut larger circle
Merry Moments Designer Series Paper: 4 pieces cut to 1 7/8 X 5 1/4", 1 piece cut to 4 X 5 1/4"
You'll also need about 10 inches of Real Red ribbon as well as the Old Olive and Real Red Stampin' Write Markers.
Now let's build our card!
HAPPY STAMPING!
![]() |
| Not Long Now! |
Labels:
Card Making,
Christmas Card,
Coloring,
Craft Supplies,
Crafting,
Cup of Cheer,
Designer Series Paper,
Giveaway,
Handmade Cards,
Paper Crafting,
Stampin' Up!,
Stampin' Up! Holiday Catalog,
Tutorial,
Vide
Location:
Cheyenne, WY, USA
Wednesday, October 28, 2015
Merry Christmas Pine Cone Card Tutorial
Hello! We've reached the middle of the week and I have another card for you today!
Today's design is a bit more subdued than the others I've shared this week ~ dare I say it? There may be someone out there that doesn't like glitter?! :)
To make this project you will need to cut the following:
*Crumb Cake: 8 1/2 X 5 1/2", scored at 4 1/4" and folded to make a standard A2 card base. We're going to use it in the landscape orientation.
*Very Vanilla: 5 1/4 X 4"
*Craft Foam cut to fit inside the stitched lines on the back of the Very Vanilla panel.
Stamp Sets Used:
Six Sayings (Hostess Set)
Berry Merry
1. Cut the card stock pieces required and set the card base piece aside.
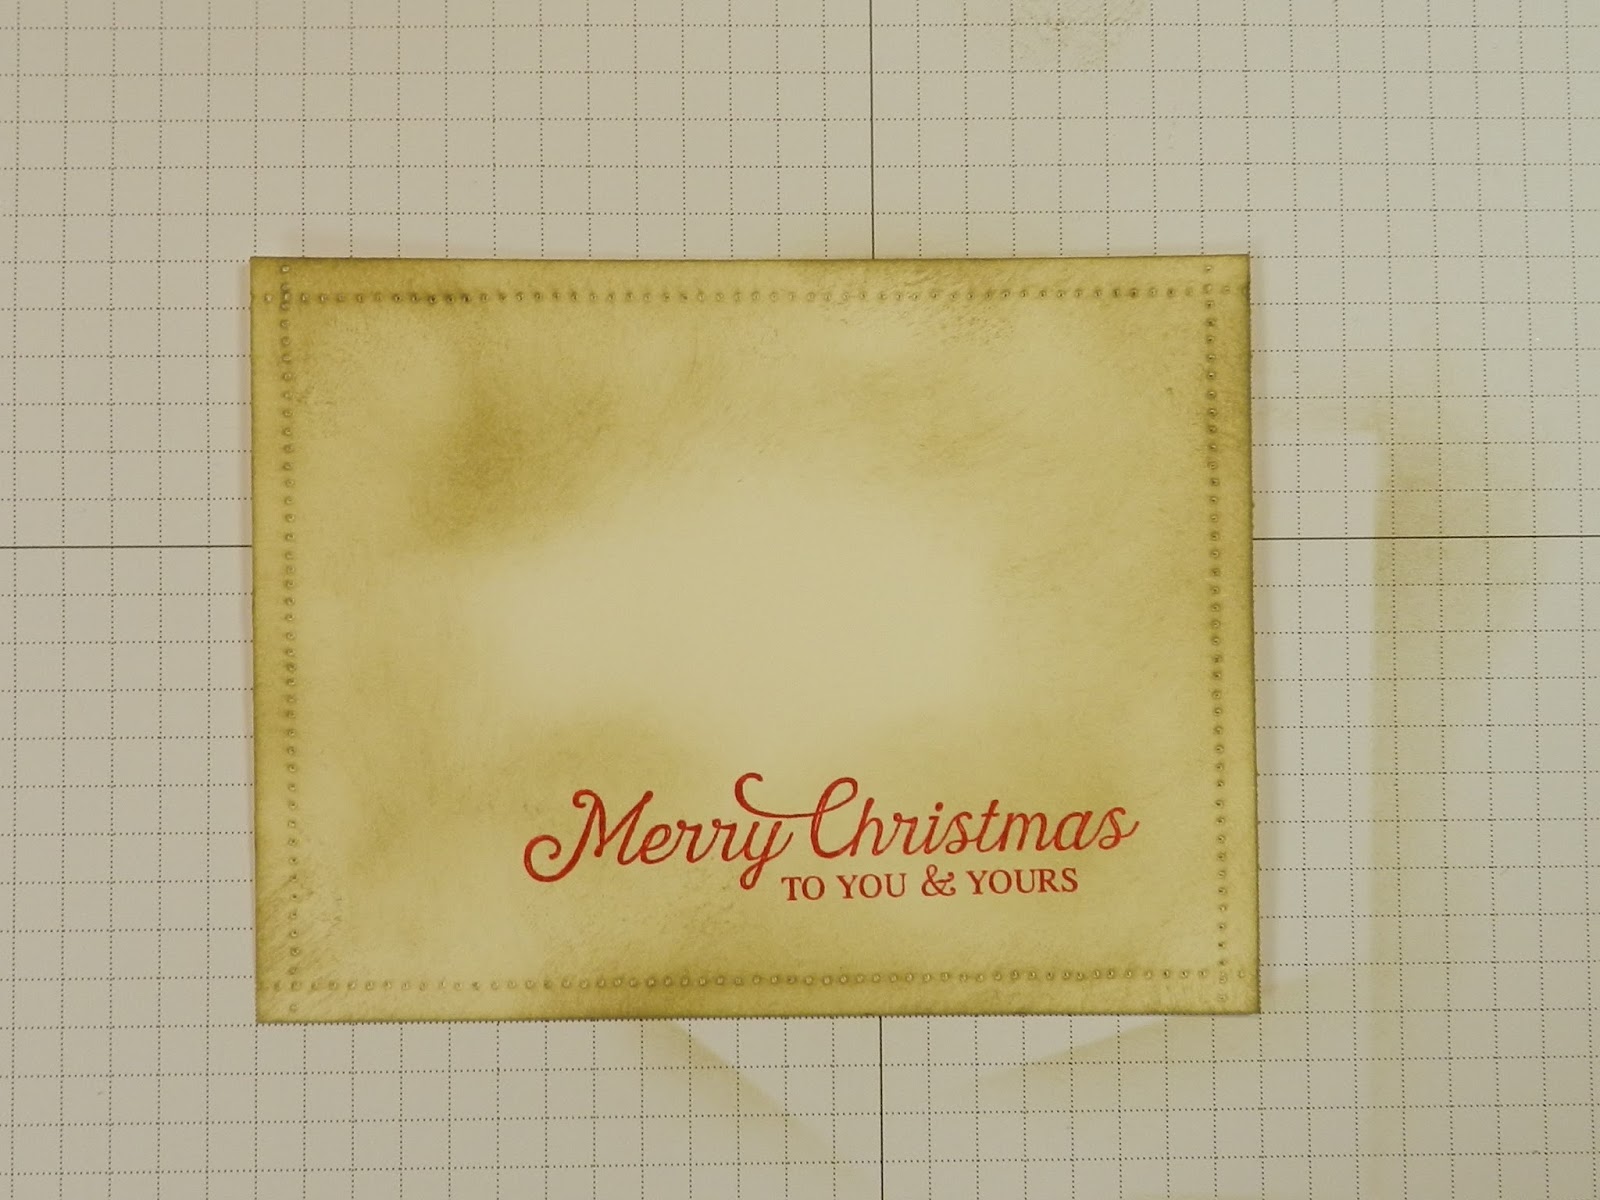
2. I wanted a stitched edge around my stamped panel and I am piercing tool challenged so I just took it to my sewing machine and stitched around the edges with no thread... semi-instant stitched border!
3. Using Crumb cake ink and a Stampin' Sponge, ink around the edges of the Very Vanilla panel as well as the folded card base.
4. Without adding more ink to the sponge, ink further in toward the center of the Very Vanilla panel letting the ink become lighter as you move to the center.
5. Using Real Red ink and the Merry Christmas sentiment stamp from Six Sayings, stamp the sentiment in the lower right hand corner of the panel.
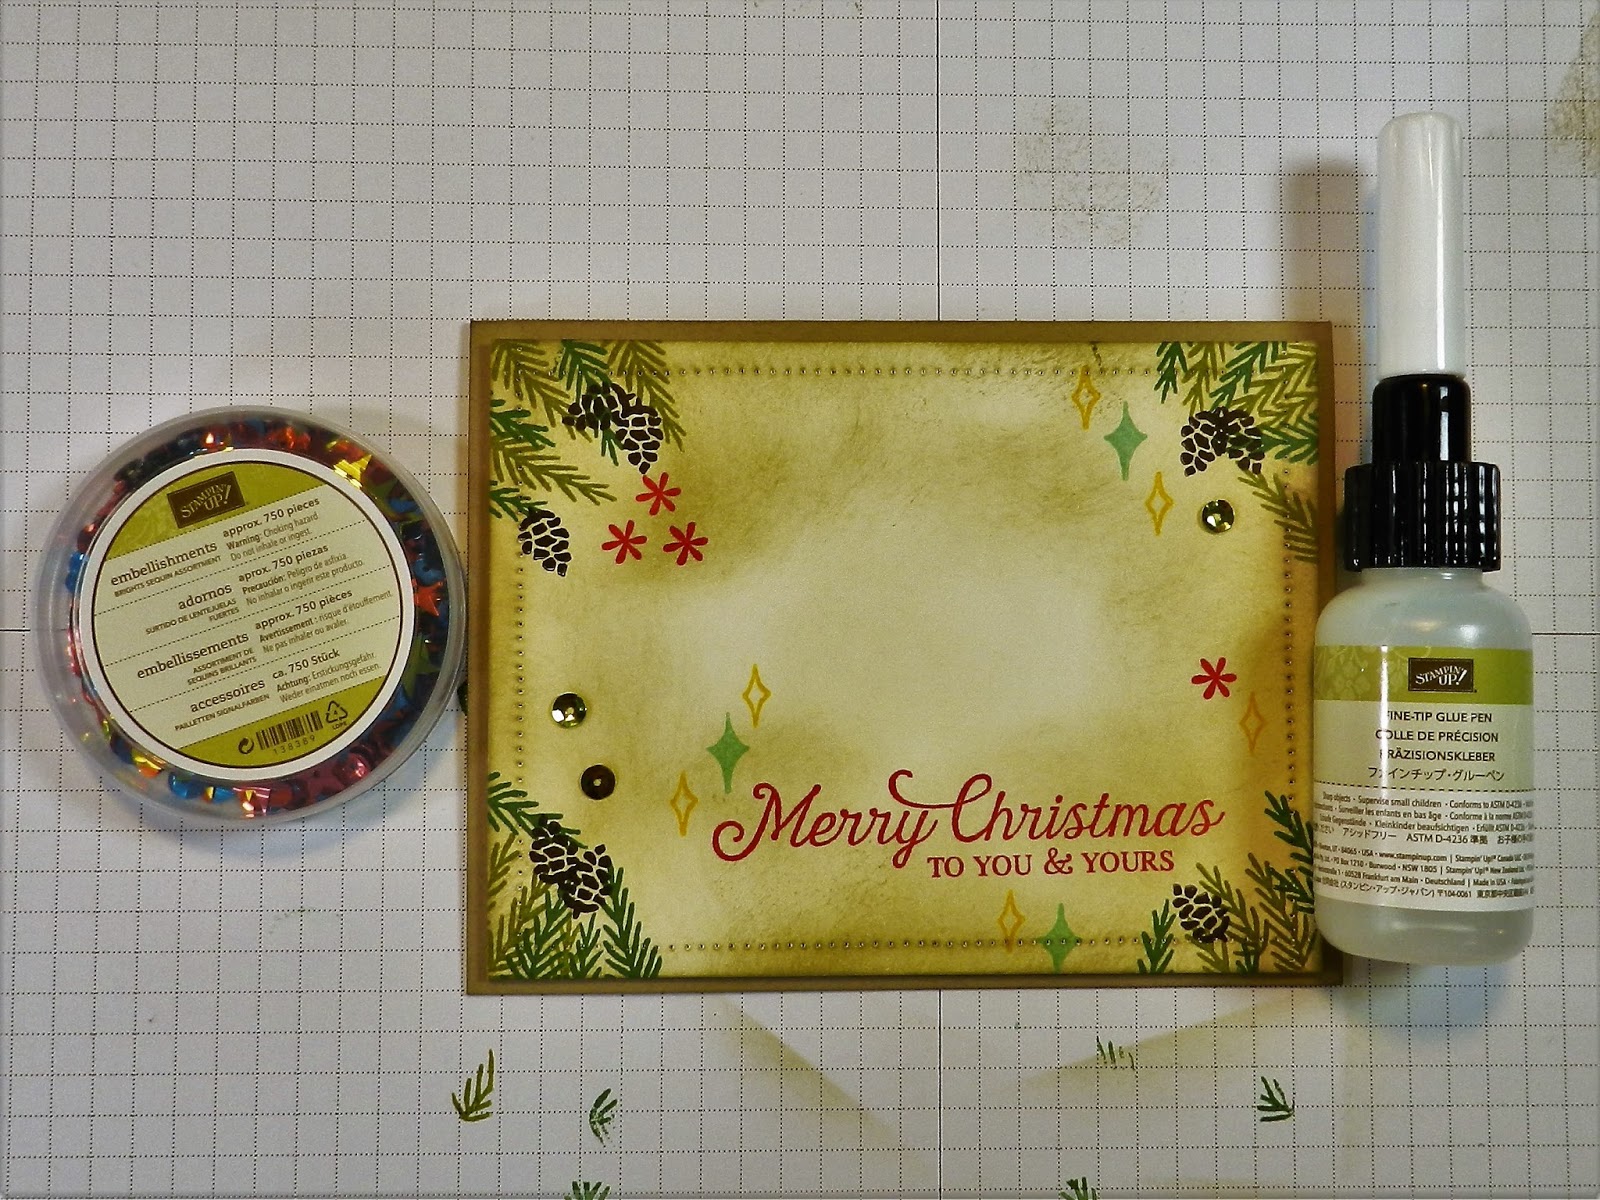
6. Using Old Olive and Garden Green inks stamp the pine branch stamps from Berry Merry in both the small and large sizes in all 4 corners of the Very Vanilla panel.
7. Using Early Espresso ink, add some little pine cones until you're satisfied with the look of them.
8. Just to add some fun, use the small diamond stamps from Berry Merry along with the flower image to stamp in some other colors on the card front. I used Pool Party, Crushed Curry and a little more Real Red in the upper left corner to balance out the sentiment.
9. Apply Fast Fuse to the back of the Very Vanilla panel and place the craft foam. Apply more Fast Fuse to the back of the craft foam and adhere the panel to the card base making sure to center it nicely.
10. With no glitter my Bling-O-Meter was not real happy with this card so I broke out the Brights Sequins and applied just 3 of the green round sequins with tiny dots from the Fine Tip Glue pen.
Today's design is a bit more subdued than the others I've shared this week ~ dare I say it? There may be someone out there that doesn't like glitter?! :)
To make this project you will need to cut the following:
*Crumb Cake: 8 1/2 X 5 1/2", scored at 4 1/4" and folded to make a standard A2 card base. We're going to use it in the landscape orientation.
*Very Vanilla: 5 1/4 X 4"
*Craft Foam cut to fit inside the stitched lines on the back of the Very Vanilla panel.
Stamp Sets Used:
Six Sayings (Hostess Set)
Berry Merry
Let's Get Started!
1. Cut the card stock pieces required and set the card base piece aside.
2. I wanted a stitched edge around my stamped panel and I am piercing tool challenged so I just took it to my sewing machine and stitched around the edges with no thread... semi-instant stitched border!
3. Using Crumb cake ink and a Stampin' Sponge, ink around the edges of the Very Vanilla panel as well as the folded card base.
4. Without adding more ink to the sponge, ink further in toward the center of the Very Vanilla panel letting the ink become lighter as you move to the center.
5. Using Real Red ink and the Merry Christmas sentiment stamp from Six Sayings, stamp the sentiment in the lower right hand corner of the panel.
6. Using Old Olive and Garden Green inks stamp the pine branch stamps from Berry Merry in both the small and large sizes in all 4 corners of the Very Vanilla panel.
7. Using Early Espresso ink, add some little pine cones until you're satisfied with the look of them.
8. Just to add some fun, use the small diamond stamps from Berry Merry along with the flower image to stamp in some other colors on the card front. I used Pool Party, Crushed Curry and a little more Real Red in the upper left corner to balance out the sentiment.
9. Apply Fast Fuse to the back of the Very Vanilla panel and place the craft foam. Apply more Fast Fuse to the back of the craft foam and adhere the panel to the card base making sure to center it nicely.
10. With no glitter my Bling-O-Meter was not real happy with this card so I broke out the Brights Sequins and applied just 3 of the green round sequins with tiny dots from the Fine Tip Glue pen.
11. Once the glue is dry, your card is complete... unless you want to add some glitter :)
DOWNLOAD THE PDF --- CHRISTMAS PINE CONE CARD
HAPPY STAMPING!
Labels:
Card Making,
Christmas Card,
Craft Supplies,
Crafting,
Giveaway,
inking technique,
shopping,
Stampin' Up!,
Stampin' Up! Holiday Catalog,
Stamping,
Stitched Border,
Tutorial
Location:
Cheyenne, WY, USA
Tuesday, October 27, 2015
Weekly Deals for October 27th!
It's Tuesday again and time for new Stampin' Up! Weekly Deals!
I'm loving the Tiny Triangle embossing folder for masculine cards and it's a great buy this week!
Glittering Christmas Card featuring Joyful Season by Stampin' Up!
Good Morning and Welcome back to Cheyenne!
Today we're making another Christmas card and this one really sparkles!
To make this project you will need to cut:
*Always Artichoke: 11 X 4 1/4"
*Whisper White: 5 1/2 X 3 3/4"
*Gold Glimmer Paper: 1/2 X 5 1/2"- you'll need 2 of these strips
*Craft Foam: 5 1/4 X 3 1/2" to fit behind the Whisper White panel
Stamp Sets:
*Joyful Season
*Embellished Ornaments
1. Score the Always Artichoke card stock at 5 1/2" and fold to create your card base.
2. Using Fast Fuse, adhere the Gold Glimmer Paper strips to each side of the front of the card base and then set it aside.
3. Prep the piece of Whisper White card stock with an Embossing Buddy.
4. Using VersaMark ink, stamp the "Joyful" onto the piece of Whisper White fairly close to the center but a little lower. As you really can't see the image all that well on white, pour the Gold embossing powder over it now.
5. Using VersaMark again, stamp the rest of your sentiment as shown in the picture and cover it with the embossing powder as well. ~Heat the embossing powder with a heat tool until it's fully melted and shiny.
6. Ink up the Holly image from Embellished Ornaments set and then using a Blender Pen, remove the majority of the ink from the berries. Stamp one image each in opposing corners of the Whisper White panel right up to the embossed sentiment.
7. Using Fast Fuse adhere the Craft Foam to the back of the Whisper White panel and then adhere the panel to the front of the card being sure to center it from side to side leaving glimmer paper showing on each edge.
8. Using Cherry Cobbler Dazzling Details, go over the lighter berry images covering the green ink entirely ~ let dry completely and your card is complete!
Today we're making another Christmas card and this one really sparkles!
To make this project you will need to cut:
*Always Artichoke: 11 X 4 1/4"
*Whisper White: 5 1/2 X 3 3/4"
*Gold Glimmer Paper: 1/2 X 5 1/2"- you'll need 2 of these strips
*Craft Foam: 5 1/4 X 3 1/2" to fit behind the Whisper White panel
Stamp Sets:
*Joyful Season
*Embellished Ornaments
Let's Get Started!
1. Score the Always Artichoke card stock at 5 1/2" and fold to create your card base.
2. Using Fast Fuse, adhere the Gold Glimmer Paper strips to each side of the front of the card base and then set it aside.
3. Prep the piece of Whisper White card stock with an Embossing Buddy.
4. Using VersaMark ink, stamp the "Joyful" onto the piece of Whisper White fairly close to the center but a little lower. As you really can't see the image all that well on white, pour the Gold embossing powder over it now.
5. Using VersaMark again, stamp the rest of your sentiment as shown in the picture and cover it with the embossing powder as well. ~Heat the embossing powder with a heat tool until it's fully melted and shiny.
6. Ink up the Holly image from Embellished Ornaments set and then using a Blender Pen, remove the majority of the ink from the berries. Stamp one image each in opposing corners of the Whisper White panel right up to the embossed sentiment.
7. Using Fast Fuse adhere the Craft Foam to the back of the Whisper White panel and then adhere the panel to the front of the card being sure to center it from side to side leaving glimmer paper showing on each edge.
8. Using Cherry Cobbler Dazzling Details, go over the lighter berry images covering the green ink entirely ~ let dry completely and your card is complete!
Click here to download the PDF --- GLITTERY JOYFUL CARD
HAPPY STAMPING!
![]() |
| It's Coming Soon! |
Labels:
Card Making,
Christmas Card,
Craft Supplies,
Crafting,
Embossing,
Giveaway,
Glimmer Paper,
Glitter,
Gold,
Handmade Cards,
shopping,
Stampin' Up!,
Stampin' Up! Holiday Catalog,
Stamping,
Tutorial
Location:
Cheyenne, WY, USA
Subscribe to:
Posts (Atom)