Showing posts with label Stamp Sets. Show all posts

Thursday, October 22, 2015

Stampin' Up! Holiday Catalog Haul & More!

Good Morning and Welcome to Thursday!

There's now less than 48 hours left to Stampin' Up's 15% Off Stamp sets Sale and it's really too good an opportunity to pass up!

I personally took advantage of this great deal and quite frankly went a little nuts!

I finished collecting the Holiday Catalog sets that I had been eyeing and picked up quite a bit from the Annual Catalog too!

Join me in the video below where I share my purchases and a little about why these particular sets appealed to me and then stay tuned to my Facebook page all day for my Top 10 Holiday Catalog Picks ~ and don't forget to share your favorites as well!


HAPPY STAMPING!

Friday, October 2, 2015

Give Thanks Mini Card Featuring Thankful Forest Friends

It’s Friday again my Stampin’ friends and time for another fun, holiday project!

Today’s card is taken directly for the 2015 Holiday Catalog and uses the brand new stamp set, Thankful Forest Friends and… is a teeny tiny one… 3X3 inches to be exact. 

This little guy is lots of fun to make so make lots of them! By the way… 3 X 3” cards fit perfectly into our Square Envelopes offered on page 149 of the current annual catalog!

To make this project you will need to cut Rich Razzleberry 3 X 6”, Into The Woods DSP 2 ½ X 2 1/2 “, Whisper White 2 ¾ X 2 ¾ “ (for the inside of the card), and a scrap of Whisper White about 3 X 3”.


1. Score and fold the Rich Razzleberry at 3” to form a 3 X 3” card base. As this card is a square you can choose which way you would like for it to fold, either at the top or to the left.

2. Attach the DSP panel to the card base using Snail adhesive making sure to center it nicely.

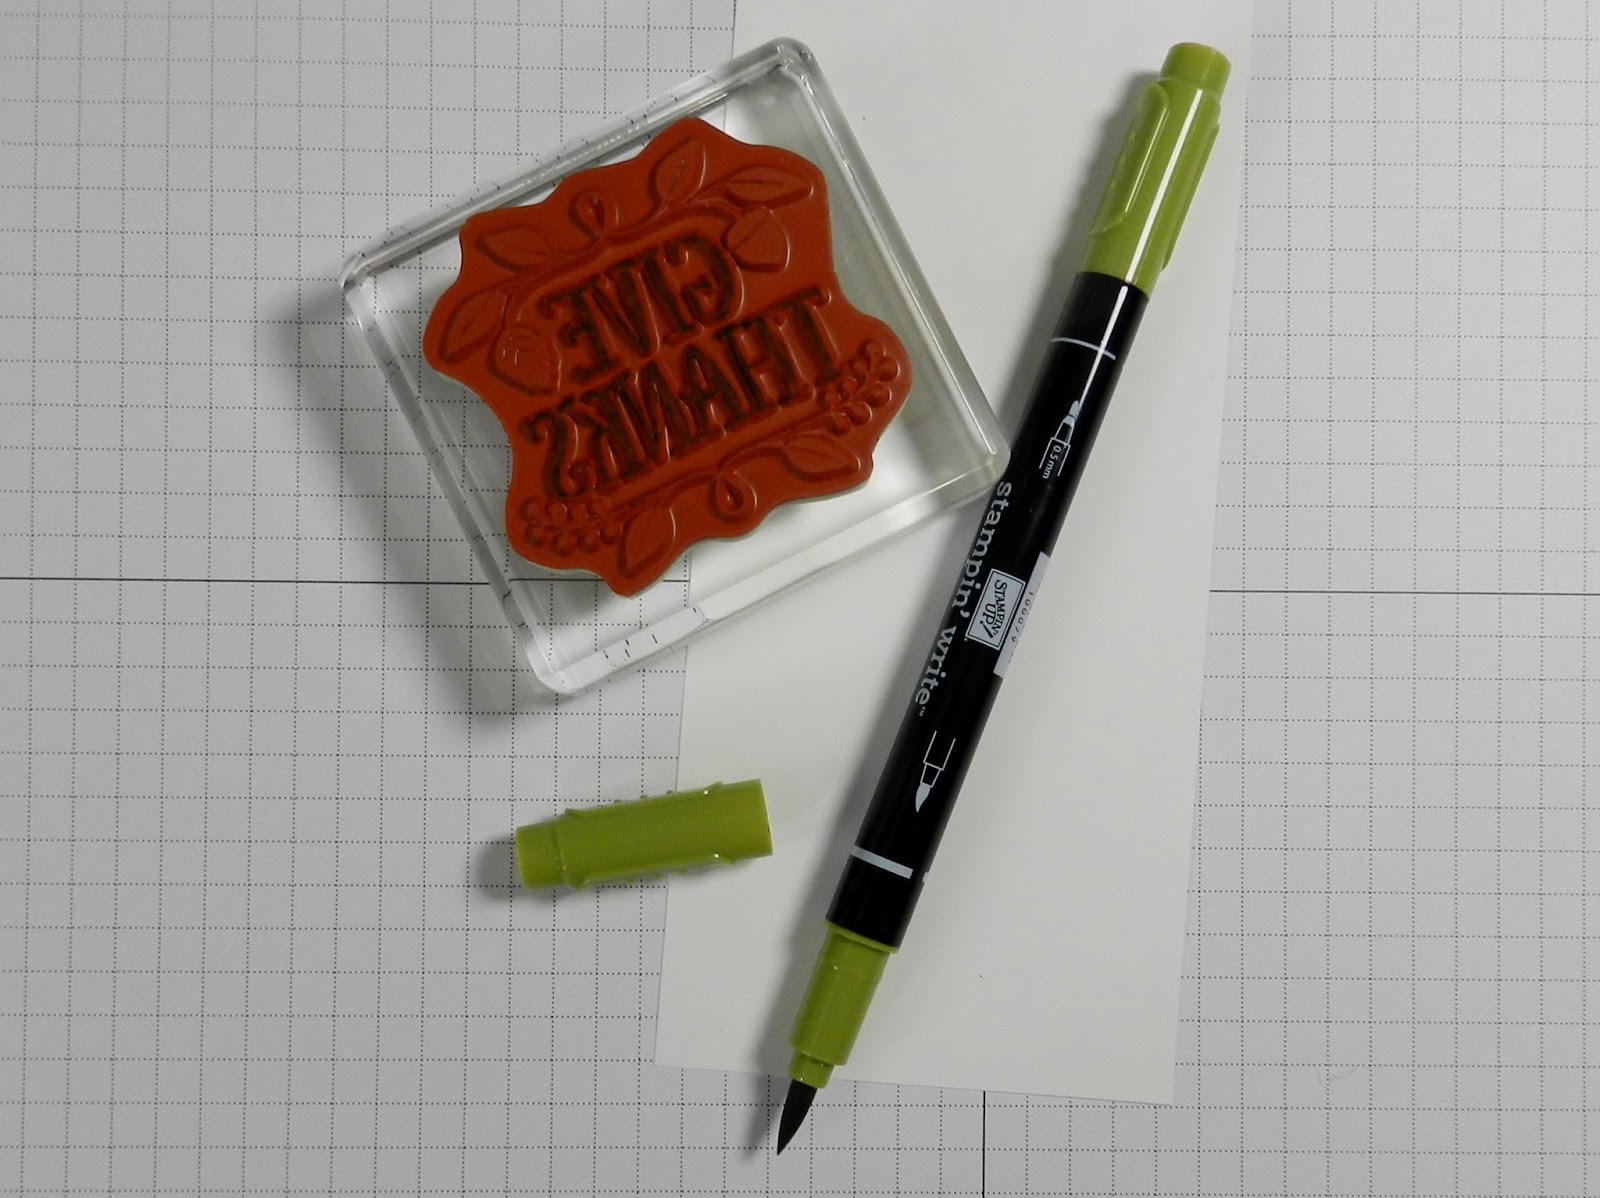
3. Using the Give Thanks stamp from the Thankful Forest Friends stamp set, color only the words in with a Stampin’ Write marker in Old Olive – Give it a good “huff” and stamp onto your scrap of Whisper White as close to center as possible. Center the stamped image inside of a 2” Circle Punch and cut.


4. Using Linen Thread and starting at the center front of the card, wrap the thread around the card front 3 times, meeting at the front on the right side. Tie a small bow as shown.


5. Place Dimensionals on the back of the sentiment circle and place on the card front over top of the Linen Thread.

6. Choose either an acorn or leaf from the Into the Woods Elements pack and adhere to the card front as shown using a mini glue dot.

7. Optional - Attach the larger piece of Whisper White to the inside of the card, centered.

~And your mini note card is complete!

HAPPY STAMPING!


Built for Free Using: My Stampin Blog
   

Monday, September 21, 2015

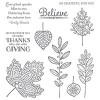
Easy & Beautiful Fall Card Featuring the Brand New Lighthearted Leaves Stamp Set!

Good Morning All! I've been away for quite a while now but it's been for a good reason... I promise!

Very recently I became an Independent Demonstrator with Stampin' Up! and I've been working to put all kinds of things together for you using Stampin' Up! products.

Today's post includes a video and written tutorial below along with interactive products links that will take you right to my Stampn' Up! online store where you can shop any time, day or night!

And now... on to the card!

Today's card features a brand new stamp set from our 2015 Holiday Catalog! Products in this catalog will only be available through January 4, 2016 so be sure to shop early!

To make this card you will need to cut the following pieces of cardstock: Crushed Curry 11 X 4 1/4", Cherry Cobbler 5 1/4 X 4", Whisper White 5 1/8 X 3 7/8" and 5 1/4 X 4" (inside panel). Additionally, cut a piece of fun or craft foam to 5 X 3 3/4".

1. Take the piece of Crushed Curry cardstock and score it on the long side at 5 1/2". Fold it over on the score line and you have now created an A2, top-folding card base.

2. Using the smaller piece of Whisper White cardstock, the Lighthearted Leaves stamp set and the photo above, stamp the sentiment in a neutral ink color at the center of the panel and fill in around with the leaves in Crushed Curry, Garden Green and Cherry Cobbler.

3. Using a Stampin' Sponge and the neutral ink color chosen, lightly ink the edges of the stamped Whisper White panel.

4. Using Snail adhesive, attach the stamped panel to the Cherry Cobbler panel being sure to center it nicely.

5. Using Fast Fuse adhesive, attach the craft foam piece to the back of the Cherry Cobbler panel being sure to center it so that it will not show from the front.

6. Again using Fast Fuse adhesive, attach the completed front panel to the card base being sure to center it nicely.

7. Optional: decorate the larger Whisper White panel and attach to the inside of the card using Snail adhesive.

~And your card is complete!


Monday, August 3, 2015

August No Spending Challenge

Good Monday Morning Everyone!

Today's post is a little different from my normal... today I'm publicly announcing (more pressure that way) that I have challenged myself  to spend no money on stamping gear in the month of August!

Why would I do this you ask? Well, I'm planning a trip in October... The Scrapbook Expo will be in Denver, CO October 2nd and 3rd and I want to go!

Denver is just down the road about an hour and half so I don't need to purchase plane tickets or even stay in a hotel though I'm thinking about it... I just want to have a somewhat unlimited budget to shop!

Registration for the Denver event opens a week from today and then it's just a few paychecks to show time so I need to stop my random purchases now and start saving that money for my Scrapbook Expo trip!

As such, I'll be making all of my challenge cards with only the stamps and supplies I currently have on hand... a challenge in itself!

Are you going to be in Denver in October?


Wednesday, July 29, 2015

Leaving on a Jet Plane...

Hello, Hello All!

A quick post this morning to share the card I made for the newest CASology Cue Week 157: WINGS!

I, Like I'm sure the majority of us do, have a ton of bird and butterfly stamps and sets but I wanted to do something differently this time. So I broke out a stamp set I received recently from a drawing on YouTube!

I added a little Broken China Distress ink "watercolor" painting to create my sky and a little sentiment by PTI to finish it all off.

A cute and simple little card... it would only have taken a few minutes if not for allowing the water to dry and fussy cutting the airplane... pretty proud of that one :)


Supplies Used:
Paper - Bazzil Marshmallow, Bin Stock in Blue & Watercolor paper
Inks - Broken China Distress Ink, Stampin' Up! Real Red & Versafine Black Onyx
Stamps - Papertrey Ink Flower Fusion #6 & TPC Studio Transportation Clear Stamp Set
Other - Wink of Stella Clear Glitter Pen & Pretty Pink Posh Sparkling Clear Sequins

Monday, July 27, 2015

Interactive Monday Card & Video ~

Good Morning Everyone! I don't have a challenge card to share this morning so I will share my most recent video on Youtube.

Today's card is made with the Triple Square Sizzix Flip-it die set and a new stamp set from Stampin' Up's most recent annual catalog! Plus some lovely paper finds from eBay!

Tuesday, July 21, 2015

RELAX… at the Beach!

Good Morning Everyone! It’s another dreary day here in Wyoming and I’m just about done with the rain and cold these days… it’s really having an impact on my disposition! Luckily I only have to work until noon today so that’s helping me feel better!

Today’s card was created for the Less Is More Challenge#233: Life’s A Beach!

Rather than go into just exactly how I made it here in writing, I’ll let you watch the video and see the whole thing, start to finish!

I’ve listed my supplies below so just in case you want these awesome flip flops, you know where to find them!

Wishing you all sunshine and warmth ~ Stephanie


Supplies Used:
Paper – Bazzil Icy Mint, Patterned Paper from Walmart, Black and White cardstock
Inks – Sahara Sand (SU); Doll Pink & Lipstick Red (SSS); Versafine Black Onyx
Stamps – Work of Art (SU); Sandals4Summer (TSoL)
Dies – Sandals (The Stamps of Life)
Other – Basic Rhinestones (SU); Wink of Stella Clear Glitter Pen

Happy Mail Haul & Video ~ Lawn Fawn, Clearly Besotted & Two Card Kits!

I was a shopping fool over the 4th of July weekend! I placed several orders with some of my favorite companies and they all came in at once!

Friday, July 17, 2015

Icing On The Cupcake!

Good Friday Morning All! YAY ~ It's Friday!

I have a huge busy weekend ahead but wanted to drop in this morning to share the card I made for CASology's Challenge Week 155: Cupcake!

This fabulous little cupcake stamp comes from a fairly new set by Dee's Artsy Impressions through Stamplorations. Dee has 4 sets out now... I was lucky enough to win the first one, bought this one, the second set, and the newest 2 are on their way to me as I post this!

They're very cute and versatile sets... and the newest of them is on sale right now!

To make my little card I cut an A2 card base of white and rounded the bottom corners. To this I added a panel of Blueberry Sky (PTI) with rounded corners and then finally a panel of Harvest Gold (PTI), cut out with pierced rectangle dies by Spellbinders.

I stamped my little cake on white cardstock, colored it in with Copics and then fussy cut it to the edge. I then stamped the outline image once again where I wanted it to be on the card front and popped the cut out over top.

The sentiment is a wood mount stamp by Stampendous called You're the Icing... I used my Stamp a Jig to make sure I got it straight and centered on the card.

And that's all there was to it... I'm hungry!

Have a fabulous Friday!

Sunday, July 12, 2015

Wheels!

Hello! I'm back again for my second card of the day!

This little beauty was created for the CAS(E) this Sketch Challenge #131!

I started with a card base made of Easter Grass cardstock by Bazzil and added panels of black and white.

The little bicycles are from The Stamps of Life set called Bicycle2Stamp and are stamped in VersaFine Black Onyx and Simon Says Apple Green.

To finish this one off I added 3 little enamel dots by The Paper Studio  and rounded 2 of the corners.

I really like how clean it came out and I was pretty successful at creating a random design this time around... something I usually have difficulty with :)

And with this card, I'll be done for the day but don't forget to check back tomorrow... there's some cool stuff on the way!


SWEET! & Yummy!

Good Morning All and welcome to the first of my card posts for today!

I made this card with my new The Stamps of Life Die-Hard Club set; Watermelon2Stamp! Aren't those little slices just the cutest?!

This wonderfully yummy project was created for Freshly Made Sketches #194 and I think it's a pretty good rendition of the sketch!

I started with a card base of Harvest Gold by PTI and then added some patterned paper that I've had in my stash for quite some time.

As I said above, the watermelon slices were made with a new Stamps of Life set along with the little sentiment.

I finished it off with some linen thread by SU, all tied up in a sweet little bow!

I'm off to garage sale with my mother-in-law but I'll see you again later today for another card!


Tuesday, July 7, 2015

Video ~ Happy Mail Mini Haul!

Good Morning All! I don't have a card for you today but I did get some odds and ends in the mail yesterday that I wanted to share... including this month's The Stamps of Life Die-Hard Club Set!


Have a wonderful day!

Sunday, July 5, 2015

Video ~ The Stamps of Life Storage Sheets

Good Morning All! Before we get to today's card, I wanted to share a little update with you on the storage sheet I received along with my June Stamp Club stamps and dies from The Stamps of Life.

I liked them so much that I purchased more and put a binder together for my TSoL collection!

Wednesday, June 3, 2015

Video ~ Welcome to Use Your Stamps (& Supplies) Wednesdays!


Good Morning All! Sorry I've been absent for the last couple of days ~ work has been a little crazy and required most of my attention... but this morning I'm introducing a new video series for Wednesdays!

Thanks so much for visiting and I'll see you all again soon!

Tuesday, May 12, 2015

You Are A 'Tweet'heart

Hello again and welcome back to Wyoming where it's FINALLY starting to warm up!

Anyway, one of the things that helped me through the snow and ice storm over the Mother's Day weekend was making fun, colorful cards like this one for the Addicted to CAS Challenge #63: Birds.

Aren't these little bird die cuts just the cutest things? They're from a set called Birdcage2Stamp by The Stamps of Life and Stephanie Barnard... this is fast becoming a favorite company!

I cut my little birds from scraps of assorted patterned paper and then mounted them onto the "wires" I stamped over a lightly sponged background in Sea Glass blue by Simon Says.

The sentiment is also from the Birdcage2Stamp set along with the little heart.

I wasn't sure I liked this card at all when I first finished it but I came back to it a few hours later and the inks had mellowed out so it was looking much better and it turns out, I like the finished project a lot!

Supplies Used:
Papers - Spring Rain & Stamper's Select White (PTI); Assorted Patterned Scraps
Stamps & Dies - Super Stripes (PTI); Birdcage2Stamp (TSoL)
Inks - Versafine Onyx Black; Doll Pink & Sea Glass (SSS)

Monday, May 11, 2015

A Bitty Bouquet Hello

Good Monday Morning to you! Yeah I know, too much... I'm trying to convince myself too :)

There is however nothing better than a new card on Monday morning and this is the one I've created for the CAS(E) this Sketch Challenge #122.

I used Neenah Solar White 80# paper to make the base and the textured panel with a Stampin' Up embossing folder.  The bouquet stamps and matching dies are by Papertrey Ink and if you're a floral junkie like me, they're really a must have set!

My banners were cut from PTI cardstock in Harvest Gold and Ocean Tides with the blue one again textured... I thought it just looked super boring flat.

The sentiment is also part of the Bitty Bouquet set... it just looks right for the flower designs doesn't it?

My whole color scheme is actually a color recipe by PTI... they put together some pretty cool ones... I just added a little Simply Chartreuse for the flower stems.

Thanks for stopping by this morning and I hope you have a wonderful day... for a Monday :)

Supplies Used:
Papers - Neenah Solar White 80#; Harvest Gold & Ocean Tides (PTI)
Stamps & Dies - Bitty Bouquets (PTI)
Inks - Berry Sorbet, Melon Berry, Canyon Clay & Simply Chartreuse (PTI)

Saturday, April 25, 2015

Papertrey Ink April 2015 Blog Hop!

Good Saturday Morning to You!

Today's card was made for Papertrey Ink's monthly blog hop for April 2015!

Our inspiration photo is posted below but basically we were to design a card with the theme of pinks and reds mixed with navy blue, a hot color trend for Spring this year.

I created my background using the Super Stripes stamp set and Enchanted Evening ink.

I'll bet you recognize these flowers too... Yes! The Sweet Life! One of my absolute, all time favorite stamp sets, on the planet!

To finish off my card I added some Liquid Platinum embossing powder on the sentiment and of course, a few Sparkling Clear sequins by Pretty Pink Posh.

Thanks so much for hopping with us today and I'll see you tomorrow with a veritable cornucopia of cards I've made recently for various challenges around the web!

 Supplies Used:
Paper - Stamper's Select White Cardstock
Stamps - Background Basics: Super Stripes, The Sweet Life
Dies - The Sweet Life
Inks - Enchanted Evening, Sweet Blush, Hibiscus Burst, Raspberry Fizz, Spring Moss, New Leaf, Simply Chartreuse & Ripe Avocado; VersaMark
Other - Ranger Liquid Platinum Embossing Powder, Glossy Accents, Sparkling Clear Sequins by Pretty Pink Posh

Sunday, April 19, 2015

Balloon Brilliance

Well... What do you know? I'm on time for once! I'm getting my Freshly Made Sketches #182 entry in well before the deadline and I LOVE how this card turned out!

For my brightly colored balloons I used another Sweet Stamp Shop set that I'm happy to report is available now ~ Balloons. It has the balloon images in both solid and outline shapes as well as the strings and the confetti pieces.

I drew on my strings just because the images were pretty tightly packed and I wanted to add some little bows!

The sentiment is from an SU set called Guy Greetings and I used it primarily because it fit the CC Designs speech bubble so well.

I'm really enjoying working with brighter colors... and wishing for the sunshine. Here in Wyoming it's been snowing, raining, sleeting and yuck for the last 2 days ~ OMG, come on Spring!


Supplies Used:
Cardstock - Cotton Candy (SSS); Stamper's Select White (PTI); Black
Stamps - Guy Greetings (SU); Balloons (Sweet Stamp Shop)
Die - Say What Bubbles (CC Designs)
Inks - Silver Pigment (ColorBox); VersaMark; Hot Lips, Cotton Candy, Goldenlocks & Maliblue (SSS)
Other - Memento Tuxedo Black Marker; White Embossing Powder (HA)